First Play of Havoc - brilliantly tactical
My wife and I played our first game of Havoc
today. It's really a shame that Brent Spivey went to such pains to
write such an elegant game and yet there's very little talk about it.
And that's the word that kept coming back to me as we played - elegant. It absolutely deserved the Origins Award it received.
Our first
task was to pick out the miniatures we wanted to use. I'm emphasizing
this because from some things I've read it seems people take a look at
the One List and go "oh, but that's not enough unit types" and never
actually try the game. That's a bit like taking a look at a curry dish
and saying "oh, but it's just a curry." Like the curry, the One List can accommodate any ingredient you care to throw at it. No, we picked out our
miniatures first, and then looked to the One List to see what fit.
We wanted to keep things relatively simple, so we decided we would each have one leader - a "Named" figure in Havoc
parlance. And as the officially designated "Learner of the Rules," I
decided that each would be the simplest archetype in the book - a
Captain. No special abilities, but 4 Havoc
dice. A bit bland, sure, but I figured we had enough to learn in our
first game, and since neither of us were even sure where or when or what we
would use the Havoc dice for, I was trying to keep my own cognitive abilities from going into meltdown.
In
our ongoing family campaign, my Romans, ever seeking to enlarge the
Empire, have invaded the island of the Amazons. This battle was to be a
flashback to the first landings. A small Roman detachment is exploring
further inland when they come upon the ruins of an Amazonian temple.
As they approach, a war party of Amazons appear to keep the Romans from
defiling their sacred temple.
The
game was almost totally lacking in terrain as it was played after a
massive ""re-organize the garage" project. Hey, sometimes life is like
that. I grabbed a sheet of cobblestone felt, stuck the D&D caryatid miniatures around (I actually do have a temple terrain project
underway of which these are destined to be part), tossed down some
glass pebbles as ruined blocks of stone, and we were off!
 |
| Turn Two - but this is where the action really started |
From
my Roman list, I picked my Captain (counting as Melee and Shield) and
decided to try giving the "support" rules a try so paired up 5 "Melee
and Shield" with 5 "Spear and Shield". The idea was to keep the
Legionnaires (Melee and Shield) in front to go into Total Defense if
needed while the Sword and Shield supported them from behind. (Having now played additional games -- this is an excellent combination to counter a cavalry charge - ed.)
For the Amazons, there was a "Dual-Wielder" Captain, 3 "Archers", 4 "Spear and Shield" and 4 berserkers ("Great Weapon").
Finally,
after a quick discussion about how they worked, we both added a
Musician and Standard Bearer to our groups to form a small command
squad.
One
thing we didn't do was to add up all the points. So it was a bit of a
shock around turn 3 for me and the Legionnaires under my command to
realize that the berserkers - "Great Weapons" were 10 points more per figure. Exactly why
they are higher cost was demonstrated at about that same time, as you will see. :-)
I
didn't take precise notes because we were learning as we played and
that was quite enough to keep up with, but the battle reconstructed from
the horrible cell phone camera shots went something like this:
I
explained that you could activate up to 6 figures at once if they were
in base to base combat, so we both deployed one main unit of 6 -- 3
melee supported by 3 spears -- and 1 smaller group each of our leaders, musicians and standard bearers. On Turn One, I
gained Momentum and used my Musician to Sound the Manuever and moved
all my units forward toward the temple. This wasn't so much for tactical effect as to just try out the rule. Incidentally - how wonderful to have rules which give Musicians a function instead of just to stand there looking pretty!
The Amazon response was to mirror my move and also fire a few arrows my way -- one of which lodged in the shield of my lead Legionnaire as he ran toward the temple (A "glancing blow" which was saved by his armor).
The Amazon response was to mirror my move and also fire a few arrows my way -- one of which lodged in the shield of my lead Legionnaire as he ran toward the temple (A "glancing blow" which was saved by his armor).
Now,
those that know me know my unluckiness with dice is usually legendary.
This game the dice were kind to me. The Amazon remarked later that her
archers played very little part in the game (I believe the comment was
"were useless") but the truth is that I was terrified of them because I
knew sooner or later my armor roll would fail. I needed to get into
cover and keep the archers at long range. Or so I thought.
Note: this was a small unit of archers, so they were incapable of using the truly terrifying "Volley Fire" rule which we saw in later games. Also, while I had briefly explained how to a "Combined Fire" and even discussed using it in this circumstance, neither of us had truly grasped just how effective that tool is. Had the archers combined fire against one of the Legion, there would almost definitely have been a casualty. In future battles, the words "archers are useless" have never again been uttered. In fact, they've usually been more like "oh look, my archers took down your elephant" or "oh look, your command squad just died."
Note: This is a strength of Havoc -- there is more than one way to do it. If you can put multiple attackers on one target, you can take down even the toughest opponent. However, learning when to use these combined attacks does make for a steeper learning curve. It really took until our 3rd game for us to realize how powerful they are.
Turn two I spent a Havoc token and kept the momentum. I was able to get most of my troops into the temple and behind cover. This is about where things started to go wrong for me. The Amazon response was a deft manuever that overpowered my left flank as their Captain led the berserkers on the attack.
 |
| Outmaneuvered - the Romans were trying to flank along the right, but the left flank would be wiped out well before they could get into combat. Difficult ground slowed them to the point of ineffectiveness. |
On
the right flank, you can see my Captain (in purple cloak) making his way to
the RIGHT flank. He immediately had to turn around to face the
berserkers. And you can see that my line has become fragmented -- the
terrain inside the temple was more cluttered than I thought.

And here you can see the situation on the Roman left -- not good! Spears and berserkers were about to unleash hell on them.
Turn
3 saw the initial bloodbath and actually the Romans did quite well
here. The leading line of berserkers were put down and while I lost two
Legionnaires as well I actually thought for a moment that the line
might hold.
(This would have been an excellent time for a Challenge. But we hadn't read that part yet!)
 Turn
4 saw the tide turn against the Romans for good. The Amazon Captain
put down her opponent at the same time that....well, I will let the
picture tell the tale:
Turn
4 saw the tide turn against the Romans for good. The Amazon Captain
put down her opponent at the same time that....well, I will let the
picture tell the tale:
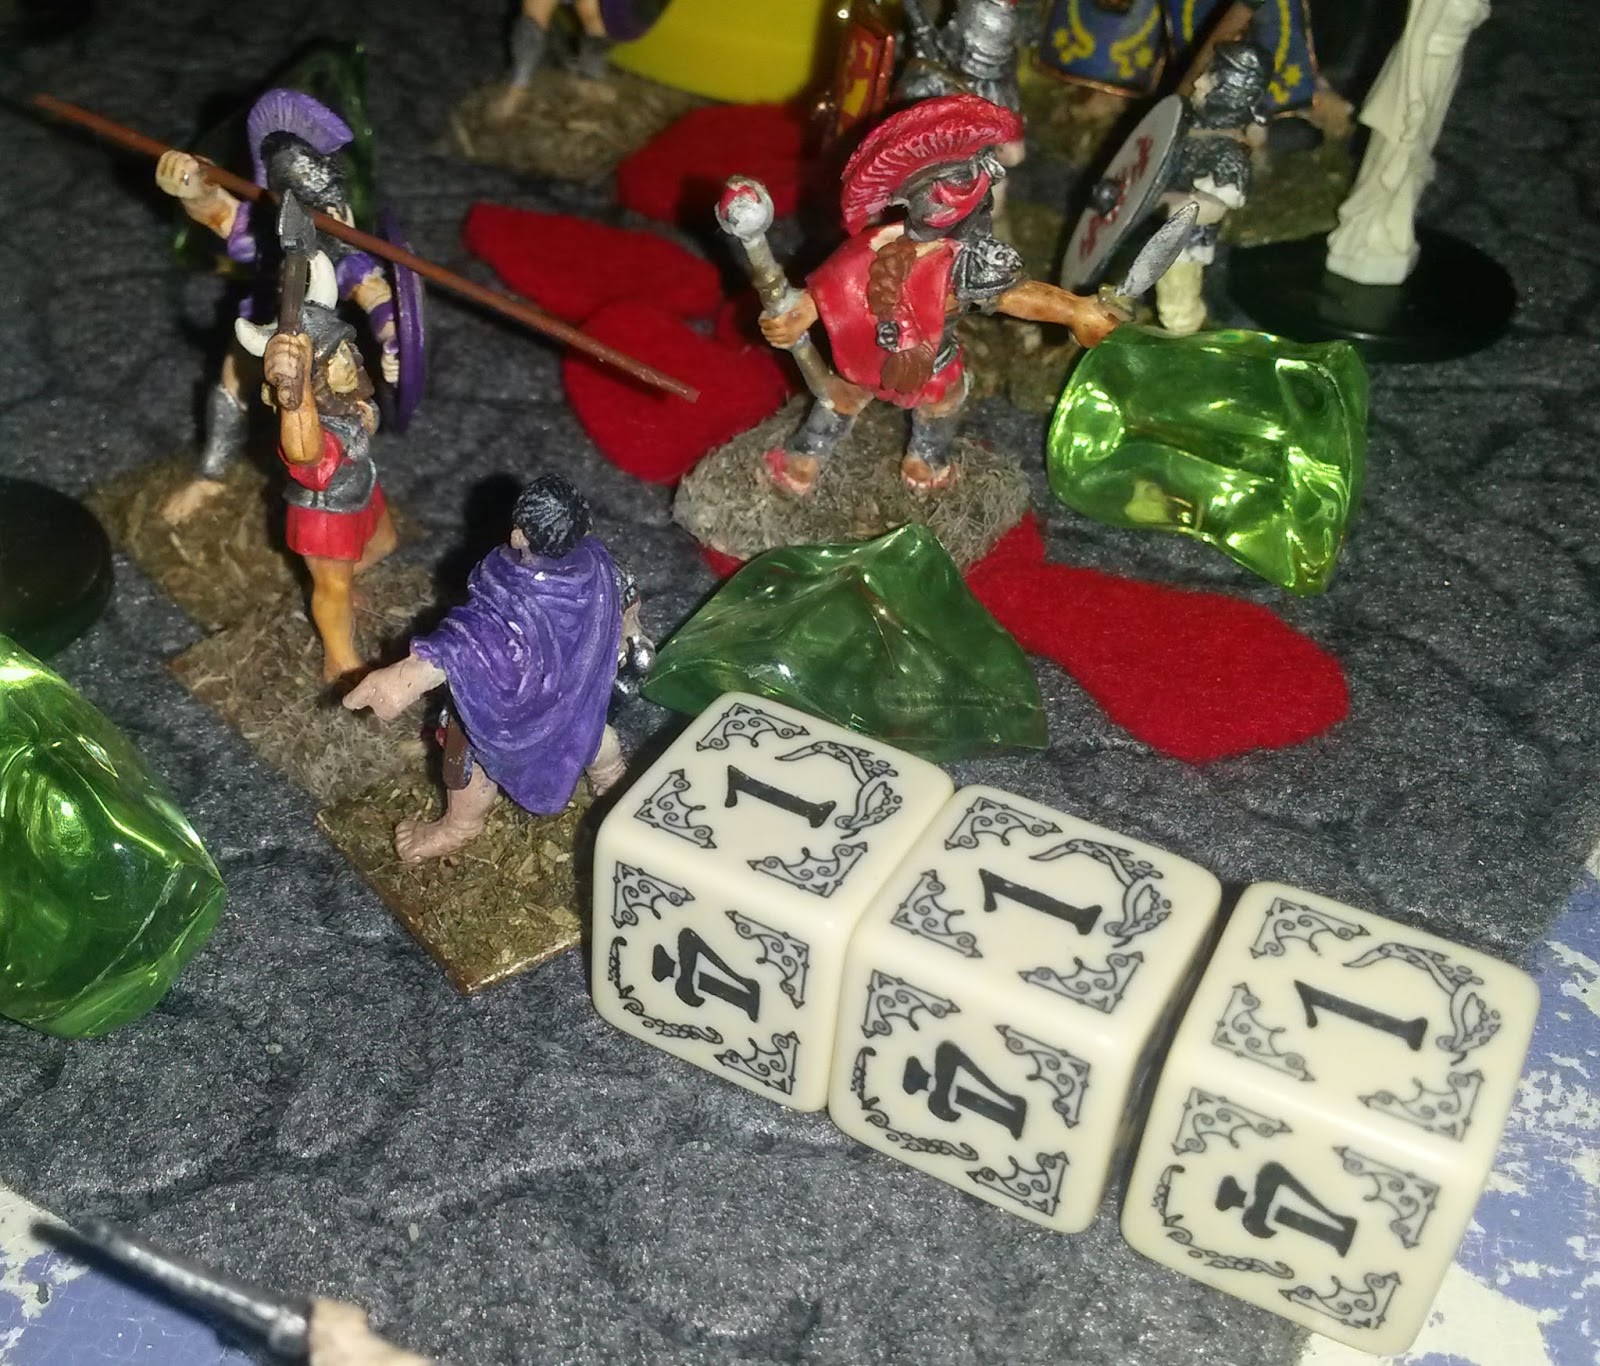
Yep,
the Roman Captain failed to kill his opponent and she cut him down.
The dice shown are his Armor roll. The berserker's axe split his torso
almost in half.
While
the game went on a few more turns, the game was pretty much over for
the Romans at this point. After losing my standard, I decided to make a
last minute dash on the Archers (who had been steadily plugging away at
any figure not in melee -- scoring many hits but thankfully never a
killing blow until the very last turn of the game). But that attempt
ended almost as soon as it began as my wife charged a berserker (Great Weapon) into my block of Melee, Spear and Musician. Here
we find out exactly why a Wide Swing can be so devastating as the
berserker cut them down with a single attack despite all of them putting
all their dice into defence. Here is exactly what the last Roman Legionnaire saw before he died:
 |
| Each blood spot a Roman corpse... |
Postscript
I
love this game! Man, did I lose badly! And was it ever fun! Every second of every turn had critical decisions to
make. Every battle with every figure was significant. Every figure's death told a story.
Unlike Warhammer, where once you close into combat everything is up to a roll of the dice, every attack in Havoc forces you to make a decision. Should I put all my dice on attack? Should I reserve a couple in case my attack fails. Should my Melee and Sword go into Total Defense or try to take out his opponent? Should I add a Havoc token to my Captain's attack or save it to try to gain Momentum next turn?
Unlike Warhammer, where once you close into combat everything is up to a roll of the dice, every attack in Havoc forces you to make a decision. Should I put all my dice on attack? Should I reserve a couple in case my attack fails. Should my Melee and Sword go into Total Defense or try to take out his opponent? Should I add a Havoc token to my Captain's attack or save it to try to gain Momentum next turn?
It
is glorious. The narrative of the game writes itself as you play. No
more "I attack" and roll the dice. No. It is "My Captain makes a 1 die
feint" followed by "2 dice to defense as her sword clangs off my
Legionnaire's shield." Or more usually in my case, "Distracted by the
feint, his 2 dice shield defense is no match and the only thing that
saves him from death is his armor." (THAT happened way too much - I
lost many defense rolls and had to rely on my Armor rolls far too
often). A single combat usually has at least a couple of
back-and-forths even for the lowliest spearman. Your decisions have direct
impact for each figure on the board.
And
we didn't even use Cavalry, Elephants, Centaurs, Dragons or any of the
other neat fantasy figures that I've collected over the past 30 years of
gaming! I can't wait to bring out my Goblin spider rider and
wolf-riders. Or even my snotling pump wagon! Or my Giant...
Next
game will likely see some more fantasy elements thrown in as my wife
has a completely eclectic fantasy band of centaurs, mermaids, pirates,
sea elves and myriad other creatures to bring to the table.
Post Postscript
All
that said -- we did run into a few rules questions. And made a few
"house rules" which are not changes but our interpretation of how things
should go.
The
most vexing rules problem was what to do with multiple figures in
combat. The fact that you can have multiples on only one side of the
battle is actually embodied as The Third Law in the rulebook. But
nowhere could I find any rules on how exactly a combat with multiples
was to be played!
Here's what we came up with. For this example, the player with Momentum has only one figure in combat; the Other has two.
1. Player with momentum declares attack and defense pools
2. Other player declares attack and defense pools for each figure in combat
For this game, we added:
3.
Player with momentum allocates attack dice to each opposing figure
before rolling any.
This was how we played it. So conceivably you could "lose" attack dice if you killed one opponent but still had Attack dice allocated against him (same way as Support works). But the more I think about it -- maybe I should be able to switch back and forth between them if I want? Does that give too much of an advantage to the solitary figure, though? After all, he is disadvantaged by having to fight two opponents. Need to think about this some more but an official reply of the intent would be welcome.
This was how we played it. So conceivably you could "lose" attack dice if you killed one opponent but still had Attack dice allocated against him (same way as Support works). But the more I think about it -- maybe I should be able to switch back and forth between them if I want? Does that give too much of an advantage to the solitary figure, though? After all, he is disadvantaged by having to fight two opponents. Need to think about this some more but an official reply of the intent would be welcome.
(Note: Brent Spivey is excellent at responding to questions. Step 3 is unnecessary and has not been used in any subsequent battle. )
The
rulebook could really, really use some more examples like this. Or a
forum. Mr. Spivey has said that he plans to use BoardgameGeek for this, but I'd really love to see Bombshell games host its own forum. That said, you'll certainly be seeing more
games played here at Colony 13. This is now our go-to set for fantasy
skirmish+ (we had 14 figures each -- I can see using up to twice that
but I'm not sure larger would work very well as the combat is so
detailed) (Note: Game 3 uses nearly triple that number of figures and while it did take an entire afternoon to resolve the game works just fine!)
I
know as an award winner this game received lots of attention in 2010.
But where's the love now? Don't let this game die - it is a glorious
ruleset!
No comments:
Post a Comment